In a world that is quickly embracing digitalization, securing your essential government IDs has become easier, minimizing the need for long queues and multiple trips to government offices. Two of the most crucial IDs for employment, banking, and health services in the Philippines are the Taxpayer Identification Number (TIN) ID from the Bureau of Internal Revenue (BIR) and the PhilHealth ID.
Here is a step-by-step guide on how you can apply for these documents, prioritizing the most convenient and modern methods available today.
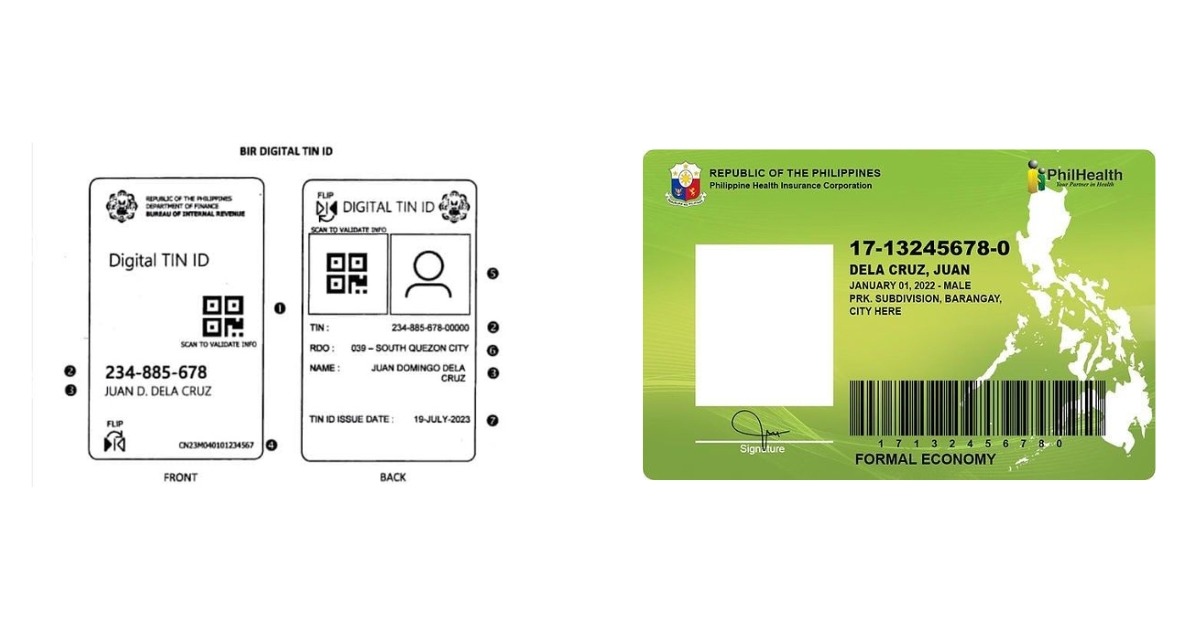
**How to Get Your Digital TIN ID**
The BIR’s Digital TIN ID is a major convenience for Filipino taxpayers. It is a digital version of the traditional physical TIN card, accessible through the BIR’s Online Registration and Update System (ORUS), and is accepted as a valid ID for all transactions. The best part? The process is largely done online and is completely free of charge.
Step-by-Step Online Application via ORUS
- Preparation is Key: Make sure you have an active email address and a clear 1x1 ID photo saved on your device. The photo must follow BIR specifications: white background, no border, full-face shot, both ears visible, and a neutral expression or slight smile (no teeth).
- Visit the ORUS Portal: Go to the official BIR ORUS website (bir.gov.ph).
- Create/Access Your ORUS Account:
- If you don’t have an account yet, click “New Registration” and complete the enrollment process. Choose the appropriate category (e.g., “Taxpayer” with “Existing TIN”).
- Crucial Step for Existing TIN Holders: You must ensure your email address is updated with the BIR. If you haven’t done this, you may need to submit a completed BIR Form 1905 (Registration Update Sheet) to your assigned Revenue District Office (RDO) via email before proceeding.
- Generate Your Digital TIN ID:
- Log in to your ORUS account. On the menu, find and select “Get Your Digital TIN ID.”
- Click “View Your Digital TIN ID” to review the draft of your ID and personal data.
- Upload Your Photo: Select and upload your 1x1 ID photo. The system will prompt you if the photo does not meet the guidelines.
- Click “Generate Digital TIN ID,” confirm the terms and conditions, and a downloadable copy will be provided.
Pro Tip: Save and print the generated Digital TIN ID. Since it includes a QR code for online verification, it functions perfectly as a valid and secure government ID.
**How to Get Your PhilHealth ID**
The PhilHealth ID confirms your membership in the national health insurance program. While online registration is available for new members to get a PhilHealth Identification Number (PIN), getting the physical ID card (either the free paper version or the optional PVC card) still requires a visit to a branch.
Step-by-Step Registration and ID Issuance
- Check for Existing Membership (PIN): If you’ve ever worked or been listed as a dependent, you may already have a PIN. You can check by calling the PhilHealth Action Center or visiting a Local Health Insurance Office (LHIO).
- Online Registration (New Members):
- Go to the PhilHealth Member Portal and look for the online registration or e-Registration link.
- Completely fill out the PhilHealth Member Registration Form (PMRF).
- Upload the required supporting documents (e.g., photocopy of your PSA-issued Birth Certificate or two valid IDs).
- Wait for the confirmation email containing your PIN and your Member Data Record (MDR). You are now a member.
- Get Your Physical ID Card (The Final Step):
- Once you have your PIN, proceed to the nearest PhilHealth LHIO or PhilHealth Express Outlet.
- Bring the following: Two (2) accomplished PMRFs (if not done online), your PIN, a valid ID, and possibly two (2) 1x1 ID pictures (requirements may vary slightly per office).
- Request for the printing of your Member Data Record (MDR) and the regular paper PhilHealth ID. This paper ID is issued for free.
- Optional PVC ID: If you prefer the more durable PVC card (which is often better accepted in banks), inquire if the branch offers it. This usually requires a small payment (typically around Php90−Php150).

Comments